


Solar Panel Roof Mounts
Tick Tock Energy is proud to offer affordable and energy cost-saving solar panel roof mounts. Our expert solar consultants carefully factor structural and building code issues to provide the right solar panel roof mount solution to home and farms in Illinois and the Midwest.
The ideal orientation a solar panel roof mount installation is facing south where optimum energy production will be achieved. If your roof faces east or west your overall energy production will typically be 10 to 25% lower compared to a south-facing. On sloped roofs, the rack supporting the solar array is usually flush-mounted for aesthetic, cost and structural reasons. The annual energy production is also dependent on the tilt angle of the array (and roof).
Other things to consider for installing solar panel roof mounts are summarized below:

Common Roof Types
Solar roof mounting can be complex without expertise and understanding about specific roof types. Tick Tock Energy has installed solar systems on all types of metal and shingle roofs. The rack for both applications is similar and the main difference is the connection between the rack and the roof surface. Common roof types in Illinois and surrounding Midwest states are:
- Shingle roofs
- Metal – standing seam
- Metal – panel type (corrugated)
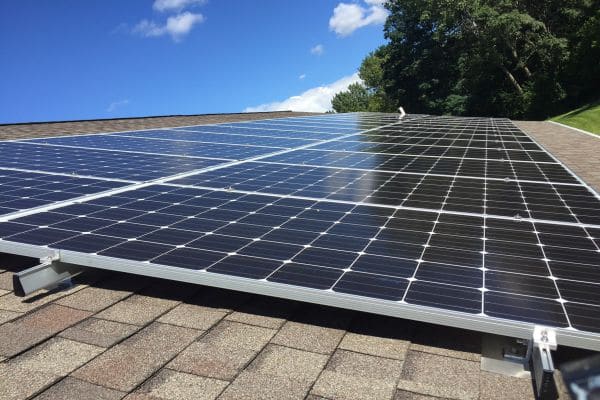
Shingle Roofs – Age Considerations
If your shingle roof is newer and has many years of life left, it’s a good time to make it roof solar panels now. If your roof is older and near replacement, you should consider replacing the shingles first or do the solar and roof upgrade at the same time.
However, with the federal tax credit available (at full 26% through 2022 and then declining to 22% in 2023) you may want to accelerate your roof replacement project and not delay. In some markets like Illinois, the solar renewable energy credit (SREC) is something you don’t want to miss out on either. Don’t let an old roof replacement project hinder your solar plan and the savings you will otherwise miss!
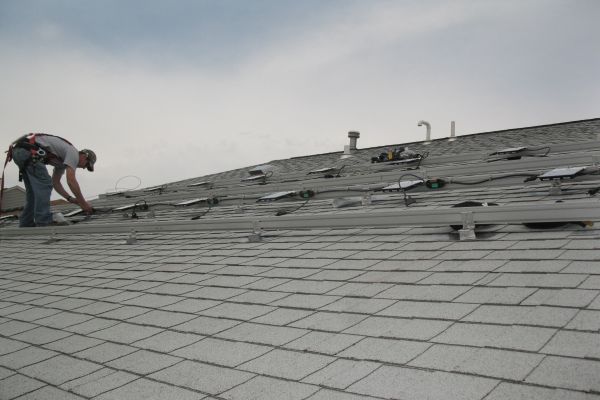
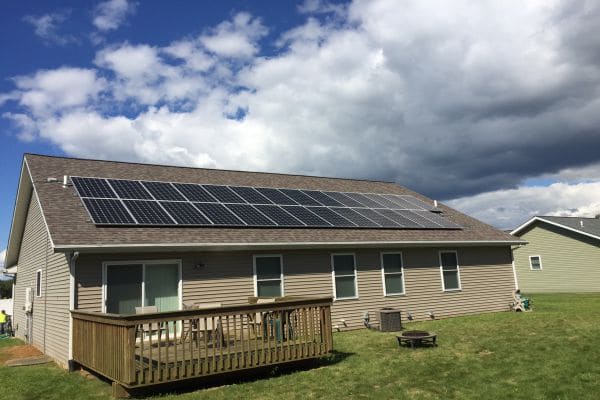
Shingle Roof Solar Mounting
A common approach for mounting solar panels to a shingle roof is fastening an “L-foot” or elevated block to your roof that is solidly anchored into the center of the truss below the roof deck via lag-bolt. The L-foot or elevated block forms the structural base and is surrounded by a thin metal flashing system that tucks under a preceding shingle preventing water from reaching the L-foot. The lag bolt anchoring the L-foot is equipped with a rubberized grommet that compresses around the bolt and around the hole penetrating the roof deck providing a waterproof installation.
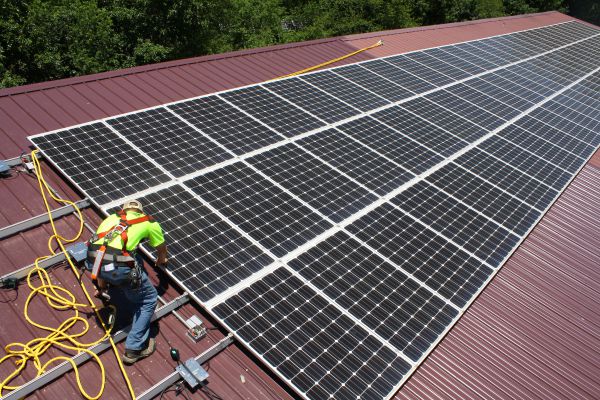
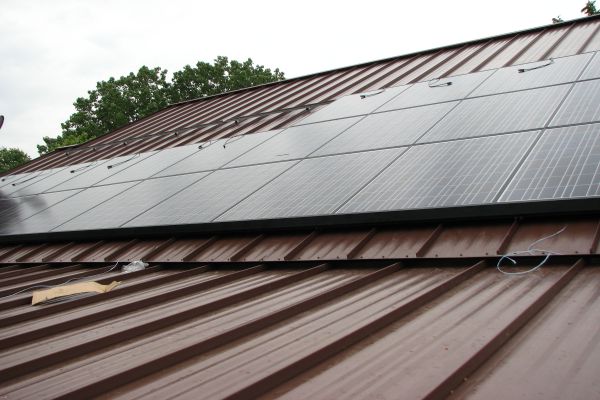
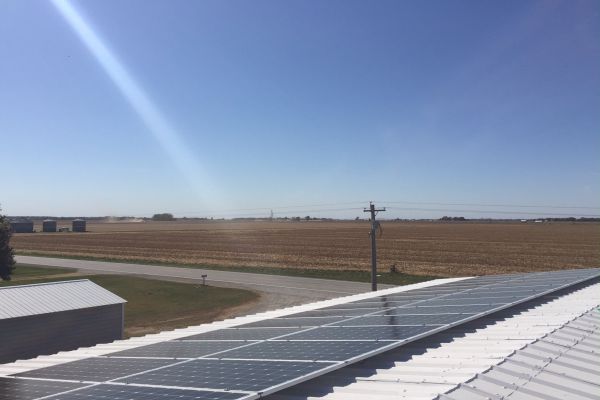
Metal Roof Solar Mounting
Metal roofs are common on homes, farm buildings and commercial buildings in many areas of the US. Mounting a solar array on these types of roofs is similar to a shingle roof with exception of the roof attachment mechanism. Two major metal roof types exist:
- Metal standing seam
- Metal panel or corrugated type
Roof Setback Considerations
When planning your solar roof mount installation, a setback around all edges or peaks of the roof is a good practice. This reduces the overall area available for capturing solar energy but has both structural and fire protection reasons. When planning our installations, we factor the local code requirements to optimize utilization of available roof area.
Fire Code / Access Around Your Solar Array
In some parts of the country, fire codes require a setback from each roof edge for fire safety personnel to access to your rooftop. This does reduce the available area for solar and can result in a smaller array. Although your local jurisdiction may have not adopted the current fire code, its good probability they eventually will.
Structural Engineering Considerations
Having a setback from the roof edges is also very important for structural engineering reasons too. In many projects, we’ll have our structural engineer advise on truss loads, reinforcing requirements, and similar matters.
Your rooftop solar array installation may be in place up to 30 years or longer. The solar array (and roof) will take a beating from Mother Nature and must stand up to high wind, hail, rain, snow, sleet, etc. The perimeter zones around your rooftop are exposed to the greatest forces during high wind and thus areas to try and avoid locating panels.
A 3-foot setback as a general “rule-of-thumb” will generally keep your solar array away from these areas of high wind turbulence and extreme forces. The figure on the left illustrates the “caution” zones that are determined by a structural engineering analysis. Placing panels in this area is possible but may require additional reinforcement.
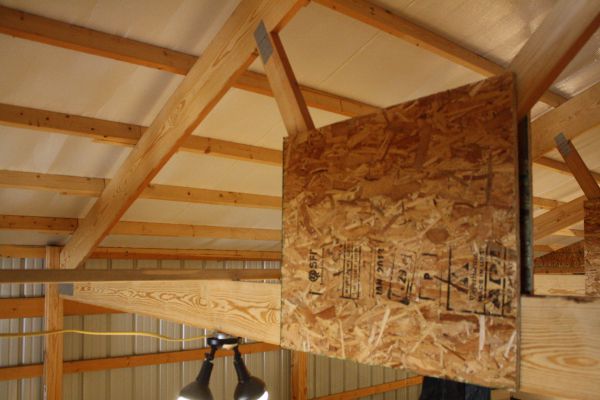
Truss / Roof Reinforcing
In metal pole barn and wood-framed building applications, we occasionally need to bolster the trusses with additional lumber. High winds on a solar array exert positive or negative pressure requiring a strong roof structure to counteract these forces. The additional weight of a solar array along with positive and downward wind forces may necessitate adding additional lumber to reinforce truss joints, members and attachments. This is often not required but a consideration.
More frequently required in a solar panel roof mount project is the need to use metal ties underneath the roof to reinforce the purlin attachment to the truss. Purlins are usually nailed into the roof trusses and nails alone typically don’t resist the pull-out forces that increase after solar is added to a rooftop under high winds. A metal tie provides an extra connection to secure the purlin to the roof truss. We typically add one metal tie near each L-foot used for the solar array rack.
Overall, the added reinforcing is a small extra cost but an important factor in protecting your roof and solar investment over the long term.
Get in touch with a knowledgeable expert at Tick Tock Energy to learn more about solar panel roof mounts. Contact us today.